Monthly Archives: November 2019

4-Strand Seed Bead Bracelet Instructions

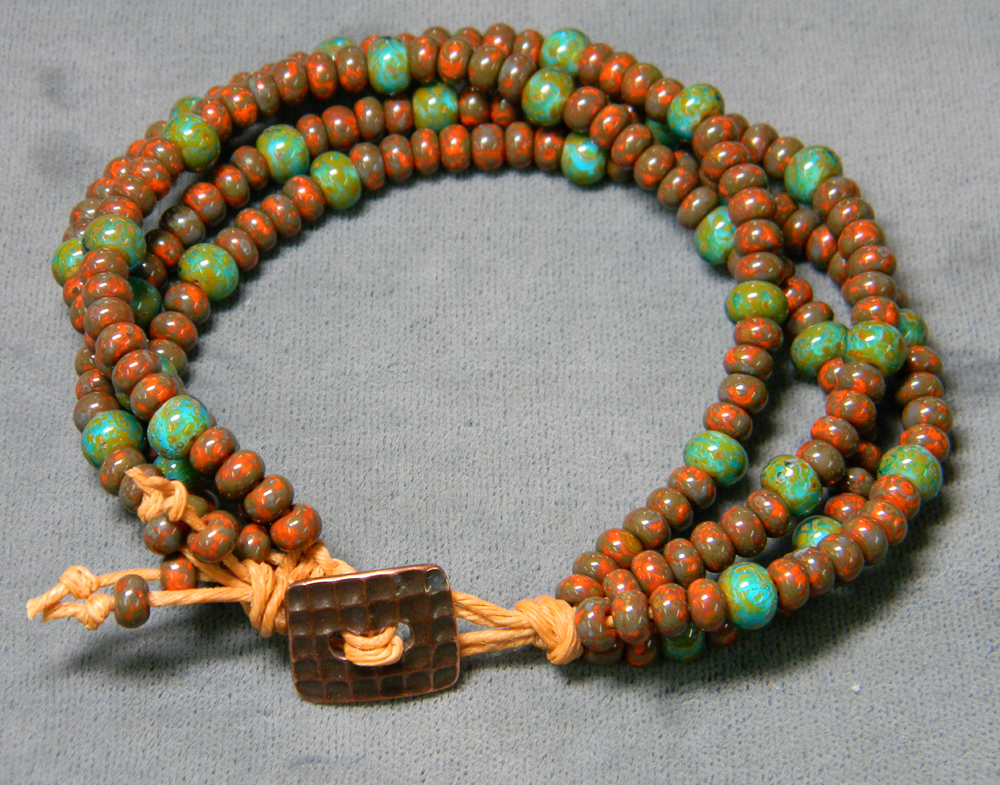
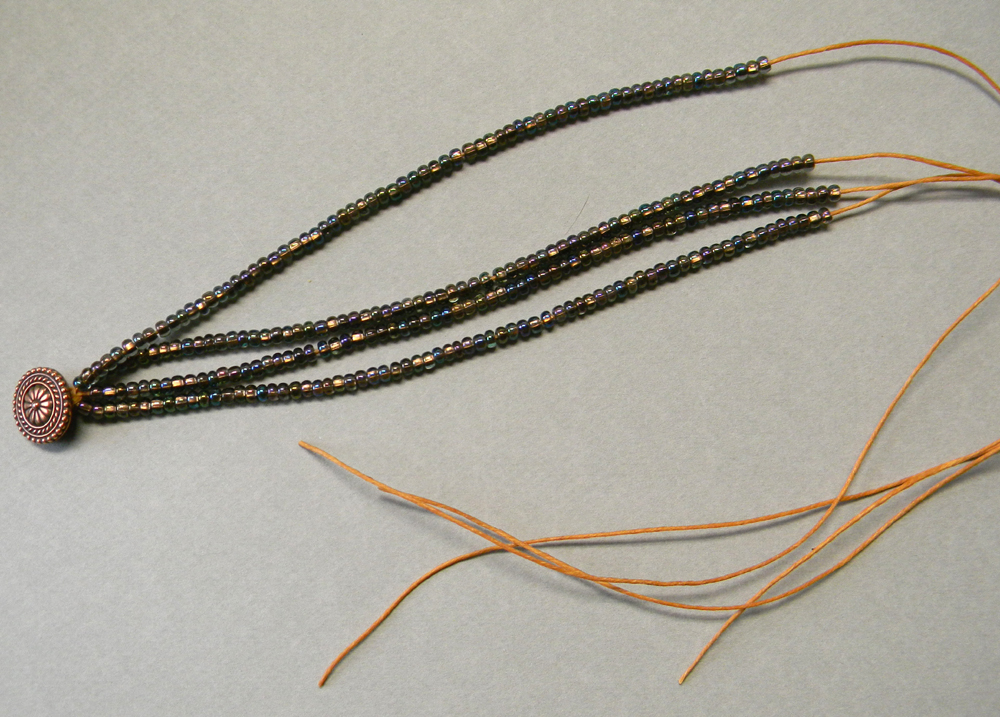
Our multi-strand seed bead bracelets are easy to make and fun to wear. The four-strand kits contain seed beads, a button for the closure, and cord. The only required tool is sharp scissors. ( Note: This example shows Czech seed beads that are strung by the manufacturer but different kits may contain loose beads.)

4-Strand Bracelet Kit No. 3 contains copper-plated Mandala button, Black Diamond Copper-lined AB Czech seed beads and two 1-yard pieces of 7-ply waxed linen cord.
String the two pieces of waxed linen through the button shank.
Move the button to the center of the two pieces of cord.
Arrange the cords so one length remains in the center and the other length is used for tying macrame knots. Tie one knot around the center cords beginning with the cord on the left.
Tighten your first knot up to the button. Make a second knot around the center cords. This time begin with the cord on the right.
Tighten the second knot up flush with the first
Here you can see the flat macrame pattern. Four or five knots are enough. Hint: if you forget which side to tie from next, look for the little “bump.” In the example above it is on the left so your next knot would begin on the left.
Now you are ready to string on beads. Seed beads that come strung are an advantage because you can slip them off in groups and transfer them to a new string quicker than stringing them one at a time.
String equal amounts of beads onto all four of the cords. Between 7 and 7.5 inches of beads will fit an average woman’s wrist. String more for a man’s bracelet. The kit provides enough beads for up to 10 inches per strand.
Tie the four strands together in an overhand knot.
Push the knot down to the beads. Pull each strand individually to tighten the knot.
Tie the four strands together in a second overhand knot leaving as space between the first and the second knots for the button to fit through.
Make sure your button fits before tightening the second knot.
String a single seed bead onto each of the four cord ends to make a decorative fringe.
Tie a double knot in each strand to keep the fringe beads from slipping off. Trim excess cord.
4-Strand Seed Bead Bracelet Kit No. 3

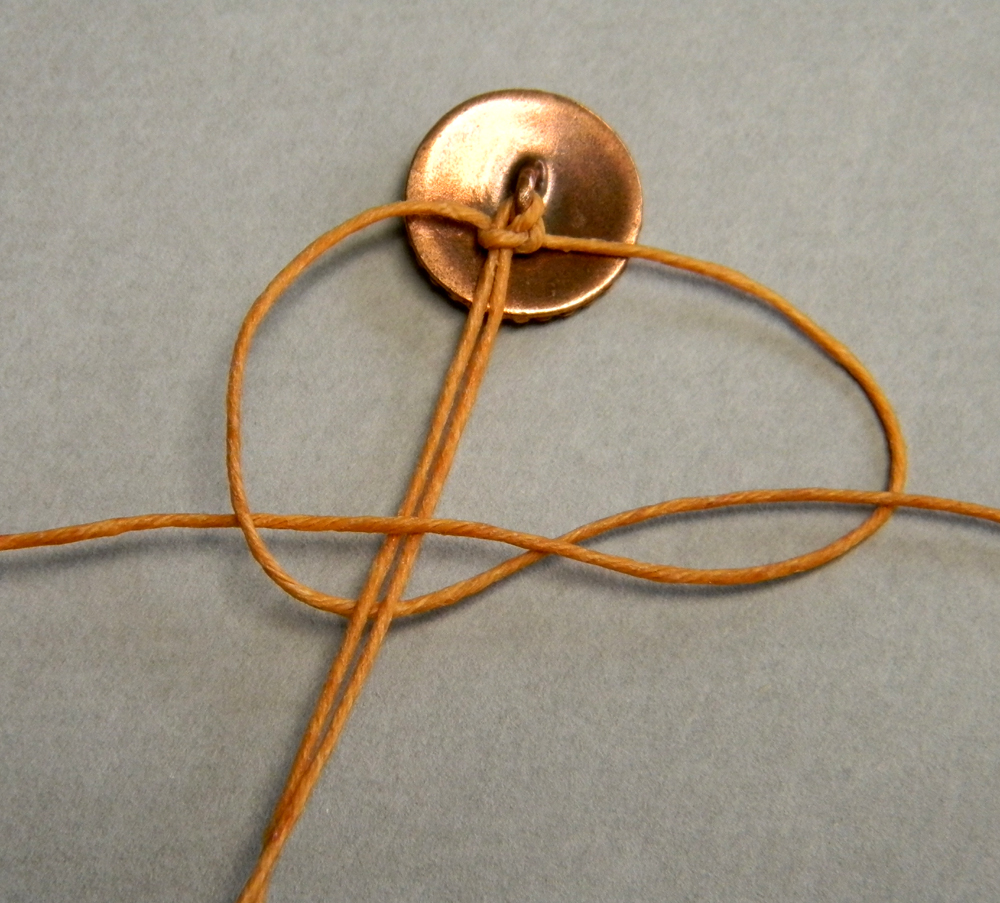
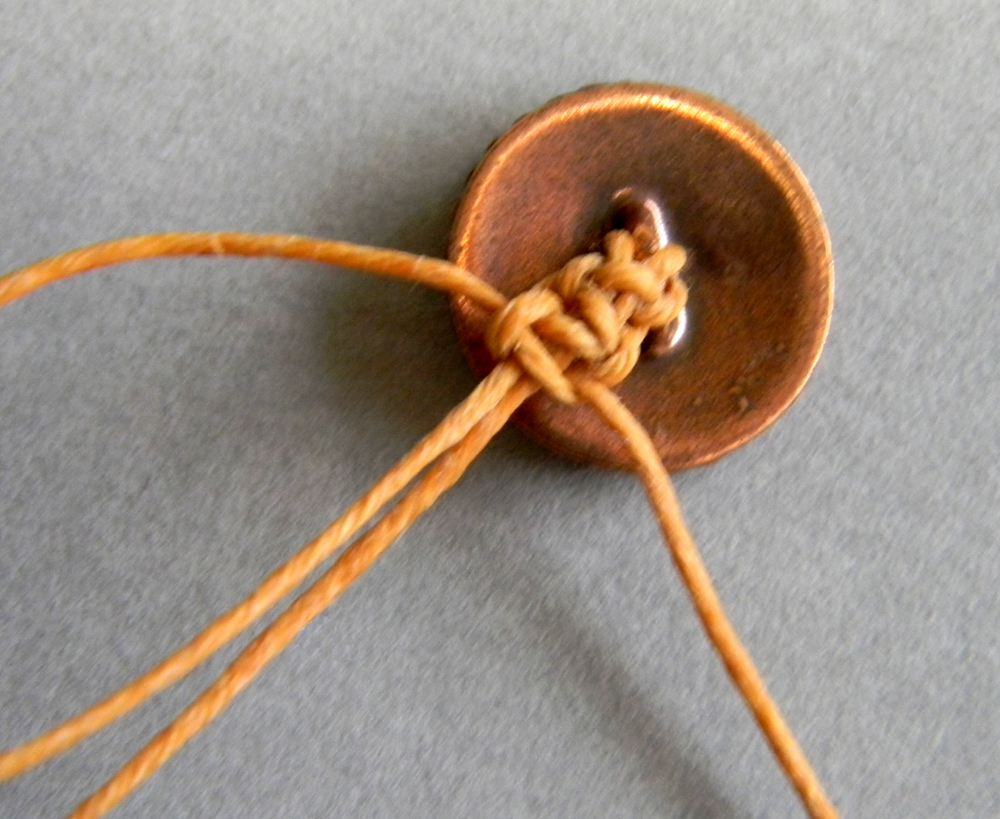
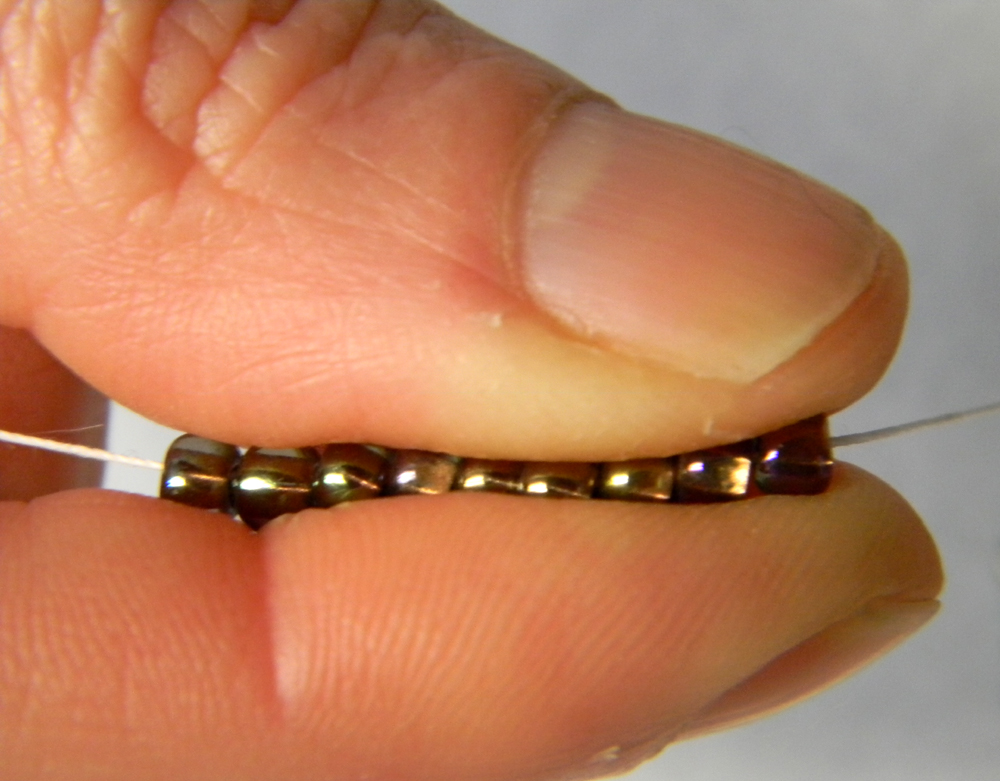
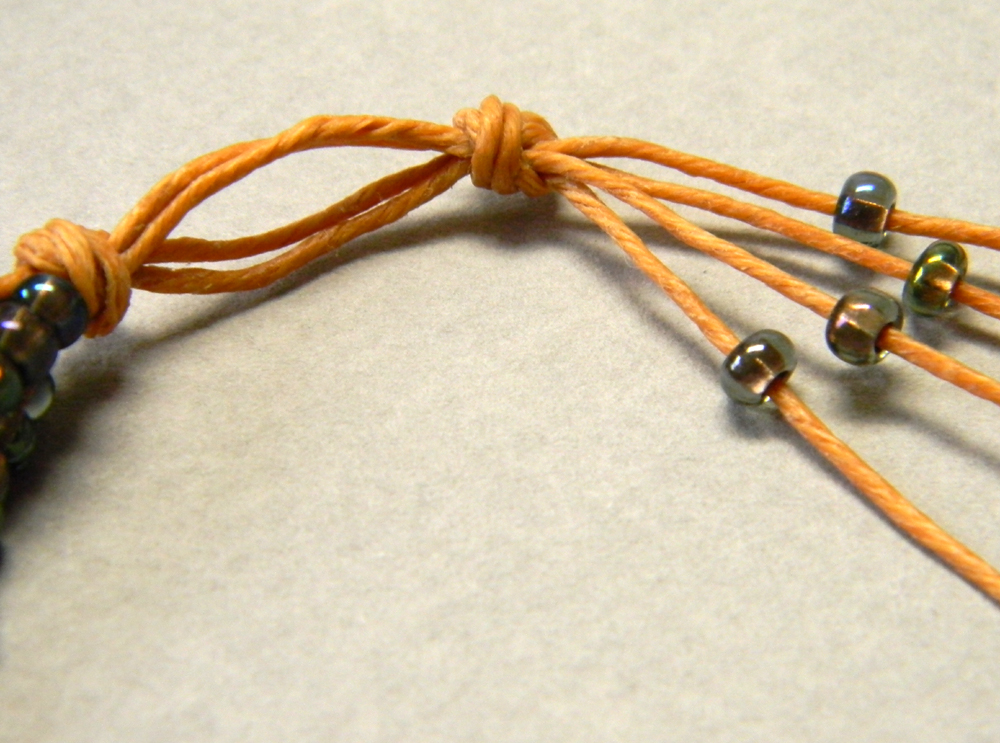
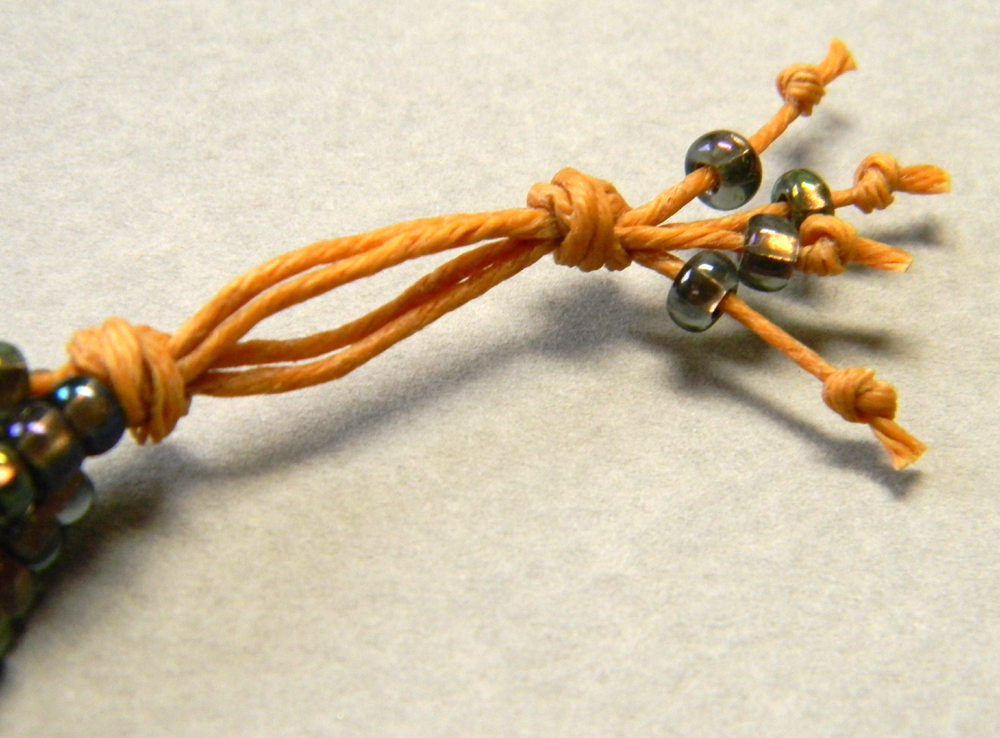
4-Strand Seed Bead Bracelet Kit No. 1 and No. 2 contain 6/0 mixes on strings. Retain the random order or re-arrange to create a custom pattern. The cording in these two kits is S-Lon Tex-400 which is not waxed. We recommend the use of Hypo Cement (available at Anita’s Beads) to secure the knots at the end. Trim your ends as necessary while you string. Extra cord is provided to allow for trimming. You can also apply clear nail polish or beeswax to the end of the cord to stiffen it.

4-Strand Seed Bead Bracelet Kit No. 1
4-Strand Seed Bead Bracelet Kit No. 2
4-Strand Seed Bead Bracelet Kit No. 4

Big Black Friday Book Sale

We will be closed Thanksgiving Day but stop in this weekend for our Big Black Friday Book Sale!

All books and magazines will be 50% OFF beginning Friday November 29th and ending Monday December 2nd at Anita’s Beads. Post cards and chromolithographs are also included in the sale. Hours are 10-5 (12-5 Sundays); closed on Tuesdays and Wednesdays.

Daily Earring Instructions

Here are instructions for making Daily Earrings to match our popular Daily Bracelets. Daily Earrings are a nice way to learn the skills in wire-working that you will need to make a Daily Bracelet.

Daily Earring Kits and Daily Earring Starts are available at Anita’s Beads. “Starts” contain all the metal parts you need to make a pair of Daily Earrings. This allows you to choose your own beads.